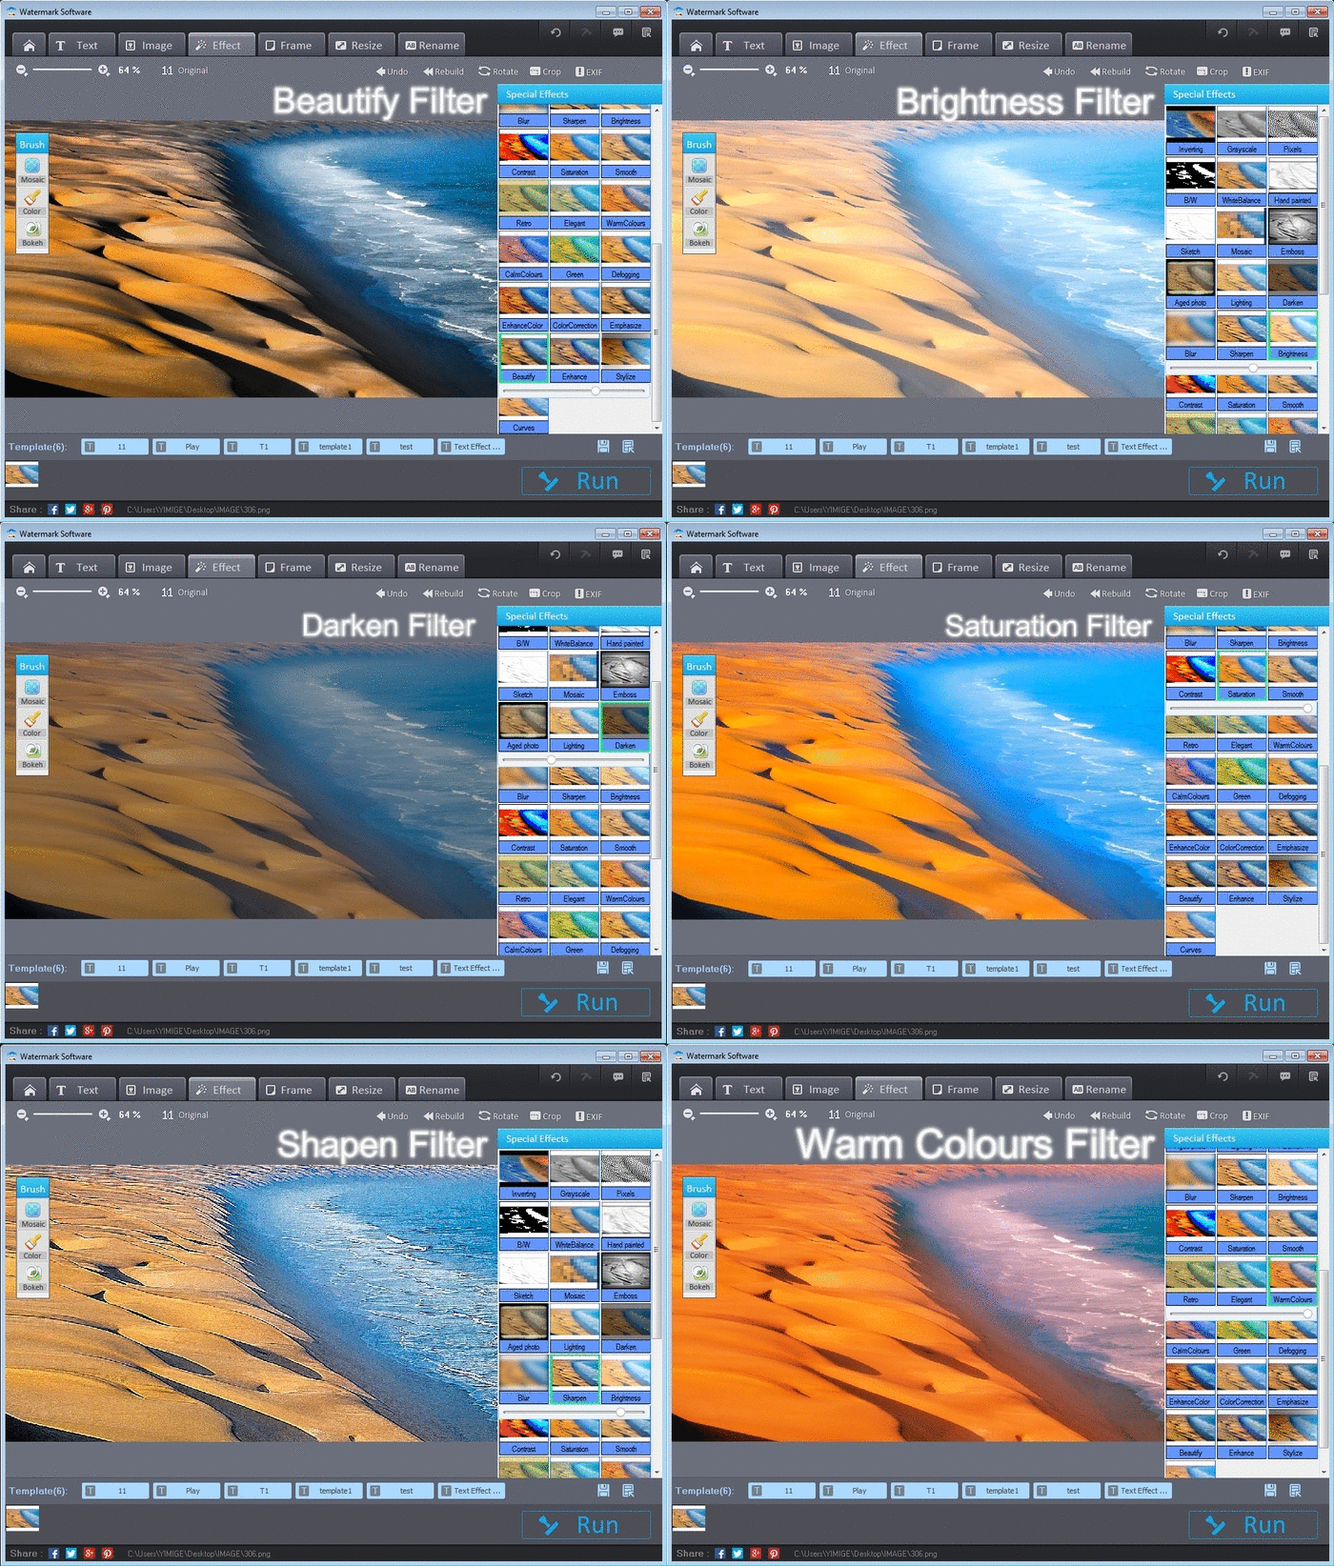
Photo filter shows
Photo filters are known to add specified photo effect. Cool filters add different hues to photos, sometimes they even create a totally different masterpiece. Vintage and retro photo filter always takes photos back in time. Black and White photo filter replaces all colors other than blank and white. Applying B&W, photos look more plain and simple. And light filter can create leisure of sunshine flying just above photos. These photo filters are usually applied in the works of advanced photographers.
Can't wait to try these photo filters on images yourself? Well, no worry, we've found the most convenient way to add filters to photos. But first thing first, we need some preparation, a proper photo filter software. We will use a batch watermark software in the rest parts as the instance - Watermark Software. Or you’d like to use other filter editor that you’ve used well. It’s totally fine, just make sure it has all cool filters in it. Saying this filter editor, it has over 30 photo filters, some of which can be fine tuned, covering all mainstream needs for filter photo.
Simply download this batch exif editor, install and launch it. Be ready to make something different.
If your goal is adding vintage filter to photos or adding retro effect, you can follow the below tips to fast get vintage filter photos.
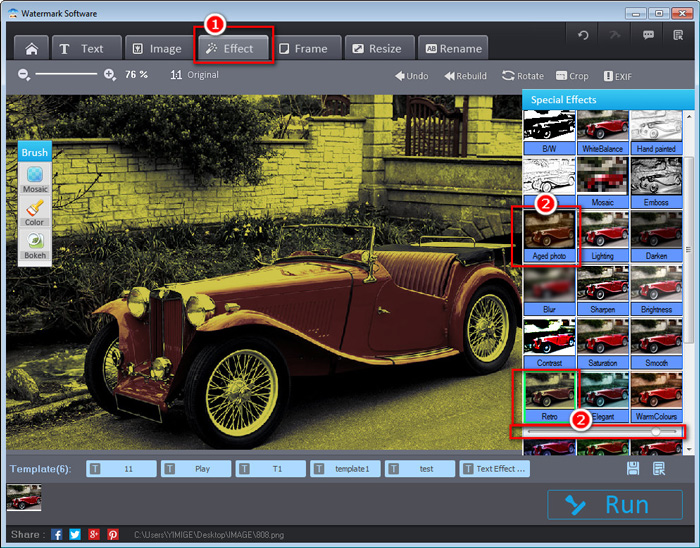
Filter photo of vintage
1. Load photos into this watermark creator.
2. Choose "Effect">"Aged photo". Or use "Effect">"Retro" and fine tune it til you are satisfied.
3. "Run" to output retro filter picture.
As long as paying attention to photography trend, we know that like infrared photography, bokeh photo is a big hit. We are entitled to add bokeh effect in 3 steps:
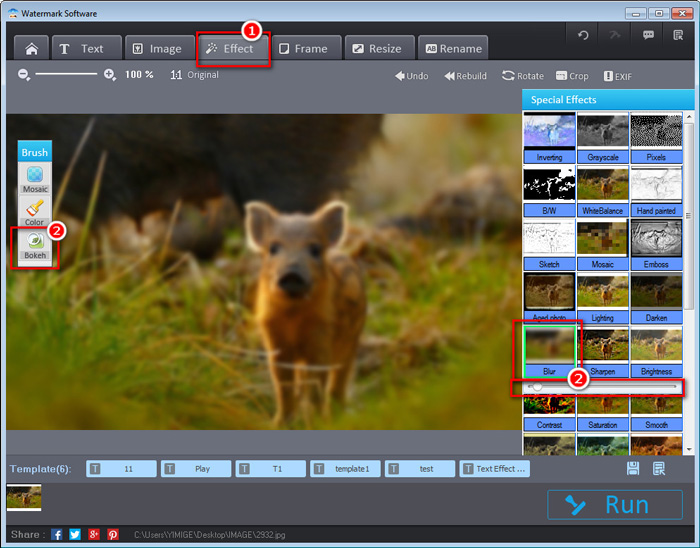
Bokeh picture filter steps
1. Load photos into image protector.
2. Choose "Effect">"Blur". Fine tune until it’s satisfying.
3. "Run" to fetch the bokeh photos.
We usually hear about purple filter. It's reasonable that we need to use purple picture filter. Unfortunately, we can’t find it directly in this photo watermark software. However, with some tricks, we can still create purple filter in two rounds. Simply keep in mind and obey color law that red and blue makes purple. So the steps can be:
1. Choose "WarmColours" and then define the red degree. (Remember the rough relative position of the bar, since we need to drag the bar to the same relative position later in the second round.)
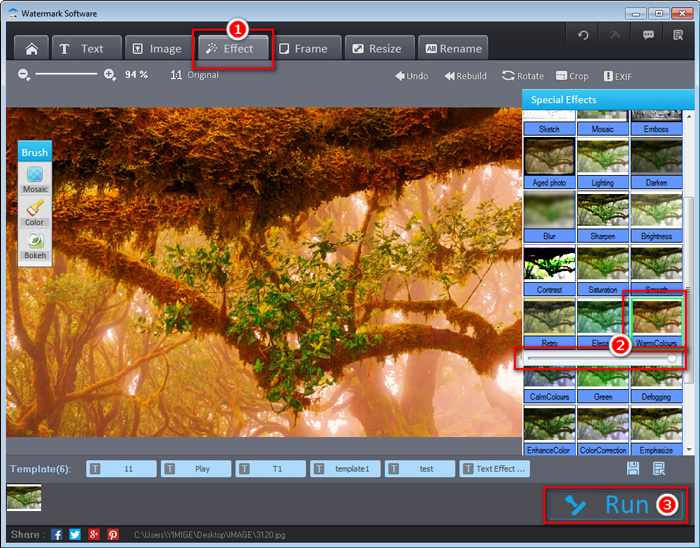
Red filter as 1st step in purple filter
2. Output the photo.
3. Select "House">"Clear", then drag the output photo into the interface.
4. Click "Effect">"Rebuild">"CalmColours" and drag the bar to the same position.
5. Output the photo again to get final purple filter photo.
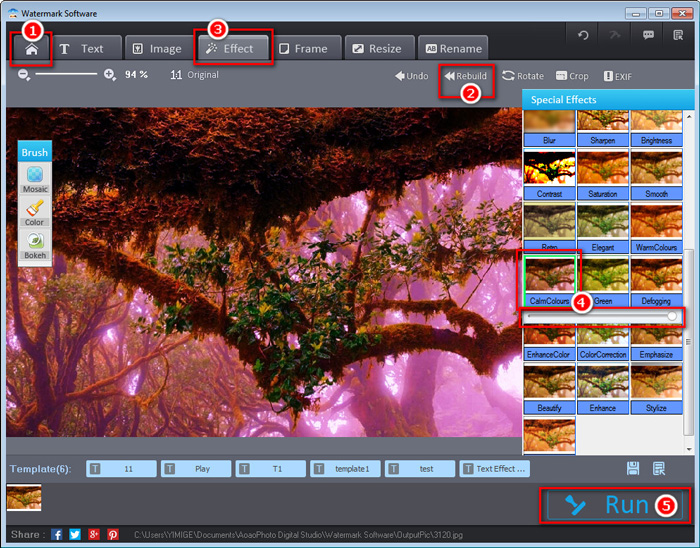
Red filter as 1st step in purple filter
Besides, what's mentioned above, this photo signature software allows us to change any photos to Black&White filter pictures, modify the saturation of graphics and apply other cool filters. Also note that the example we take uses solo picture, since we want to make it clear enough. Nevertheless, this filters for photos can be used to process a number of photos at one time. Take advantage of it, you can save substantial time.